Create Dynamic Reports and Documents Using LAMP & FOP
Author Note: This was originally written for Linux Journal in 2008. I am replicating it here for posterity.
In the April 2007 issue of Linux Journal I covered how I used SVG images along with XSLT to generate dynamic, cross platform reports and forms. Several times since creating that system I have found myself needing a similar, but lighter solution to produce simple documents and reports. When my colleagues and I were researching the SVG solution we took a look at Apache FOP (Formatting Objects Processor) and loved it but ultimately decided we needed something more robust. So when I started looking for a lighter solution I naturally gravitated towards FOP.
After some trial and error I found that using FOP works really well for transforming XML data into neatly formatted PDF documents. Some further research proved that PHP did an impressive job of pulling data from multiple data sources (MySQL, PostgreSQL, Oracle, CSV Files, DB2, and more) and converting it to XML. Further on, I was able to integrate FOP directly into my company’s existing web infrastructure using the PHP Java Bridge extension.
The final solution involved creating a PHP based transformation harness that can convert data from an arbitrary data source to another; in most cases the data is stored in a PostgreSQL database. The system then takes the XML and does an XSLT transform to create a FO (Formatting Objects) document. The FO is then passed off to FOP to produce a neatly formatted PDF for the user.
While designing the initial FO documents, that would later become XSLT, I also found that Abiword could read and write FO fairly well. This bit of knowledge made designing all of the initial documents easy.
This article covers how I tied all of these pieces together to create a solution that provides on-demand, dynamic, professional documents from nearly any data source.
Apache FOP
FOP is a tool developed by the Apache Foundation to implement XSL-FO (Extensible Stylesheet Language for Format Objects), an XML based format language. FOP is written in Java; it takes XML and produces documents in several formats, PDF being the primary format.
The latest version of FOP (0.94 at the time of this writing) requires a JRE (Java Runtime Environment) of at least version 1.4. If FOP is to be compiled from source version 1.4, or later, of the JDK (Java Development Kit) is needed. For most applications the pre-compiled binary version will due. Once the Java environment is setup FOP can be downloaded (see resources), unpacked, and installed.
There is not an installer in the proper sense. This means that the install process simply involves putting the files wherever it makes the most sense on the target environment. In the binary distribution the important files are located in the lib and bin directories. To fully utilize FOP all of the .jar files in these directories need to be on the Java classpath. In the root directory of the package there is a shell script named “fop” that enables you to run FOP from the command line; it is best to put this file somewhere on the system path — /usr/bin for example. At this point FOP should be installed and ready to use.
Using Abiword to Create FO Documents
Abiword is a highly usable, simple, no-frills word processor that runs on a variety of platforms. On most Linux distributions Abiword can be installed by using the systems package manager. If the Abiword package is not directly available it can be downloaded and installed from the Abiword website.
An excellent feature of Abiword is the extensive plugin system that adds miscellaneous tools and support for various document formats to the core program. One of the plugins is a FO reader and writer. This plugin gives users the ability to create and edit FO documents. It is also useful for opening documents in a different format, such as Microsoft Word, and converting them to FO.
To enable the FO plugin first install the Abiword plugin package (abiword-plugins on Ubuntu) using the systems package manager, or by using the information on the Abiword website. Next launch Abiword and click Tools > Plugins… in the menu bar; confirm that “XSL-FO Importer/Exporter” is in the list of active plugins. If that option is not available then the plugin is not installed and the installation process needs to be repeated.
Now that Abiword is correctly configured it can be used to create FO documents. As mentioned earlier Abiword can convert any document it can read into a FO document. However, the conversion will most likely be imperfect and require some adjustment.
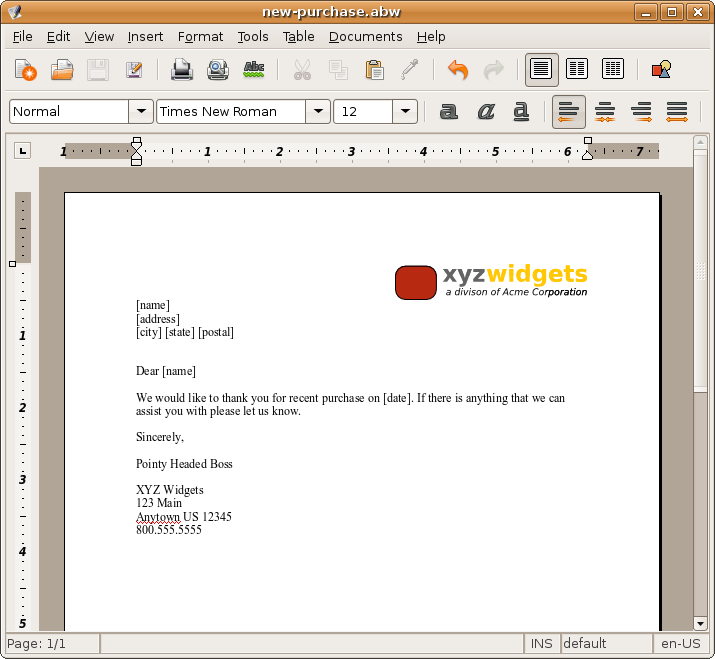
For the purpose of this article I will create a new document for a fictitious company (see Figure 1); the documents purpose is to thank each customer that has made a purchase in the last 90 days. The document consists of the company’s logo, the customer’s address, and a short message thanking him or her for their purchase. It is very simple but it will serve as a good example; XSL-FO is much more capable than this example shows.
When creating a FO document that will be later modified to include XSLT information it is a good idea to use common place holders that are easy to find later on. In this case dynamic information is surrounded by square brackets.
The source of the document, saved in FO, looks like this:
<?xml version="1.0" encoding="utf-8"?>
<fo:root xmlns:fo="http://www.w3.org/1999/XSL/Format">

<fo:layout-master-set>
    <fo:simple-page-master margin-top="1in" margin-bottom="1in"
        margin-left="1in" margin-right="1in"
        page-width="210.000000mm" master-name="first">
	    <fo:region-body/>
    </fo:simple-page-master>
</fo:layout-master-set>

<fo:page-sequence master-reference="first">
    <fo:flow flow-name="xsl-region-body">
        <fo:block text-align="right">
            <fo:external-graphic src="url('logo.png')" />
        </fo:block>
        <fo:block>[name]</fo:block>
        <fo:block>[address]</fo:block>
        <fo:block>[city] [state] [postal]</fo:block>
        <fo:block></fo:block>
        <fo:block></fo:block>
        <fo:block>Dear [name]</fo:block>
        <fo:block></fo:block>
        <fo:block>
            We would like to thank you for recent purchase on [date].
            If there is anything that we can assist you with please
            let us know.
        </fo:block>
        <fo:block></fo:block>
        <fo:block>Sincerely,</fo:block>
        <fo:block></fo:block>
        <fo:block>Pointy Headed Boss</fo:block>
        <fo:block></fo:block>
        <fo:block>XYZ Widgets</fo:block>
        <fo:block>123 Main</fo:block>
        <fo:block>Anytown US 12345</fo:block>
        <fo:block>800.555.5555</fo:block>
        <fo:block></fo:block>
    </fo:flow>
    </fo:page-sequence>
</fo:root>
As you can see the document is just simple XML. There are four basic components to this document right now. The first is the header (line 1); this signifies that the content enclosed is XML.
Next is the root node. it is the outer XML node that encompasses the rest of the nodes. This node also defines the XML namespace that FO uses throughout the document.
Then there is the layout-master-set node. This node houses all of the page layouts that are defined in this document. In the case of this document there is one page type named “first”. FO documents can an have an infinite amount of layout definitions; however, they all need to have a different name — specified by the value in the “master-name” attribute.
The final component is the page-sequence node. There can be one or more page-sequence nodes in an FO document. Each one contains all of the information that will be displayed in the rendered document. FOP will also insert a page break at the end of every page-sequence node. This feature is useful for generating the same content again and again inside of the same physical document — just like the example.
Before this goes to FOP there are a few alterations that need to be made. The first deals with some formatting issues. If you notice Abiword uses empty fo:block nodes to signify a line break. FOP does not recognize this block as relevant so it does not produce it in the PDF. To fix this issue, remove the empty block nodes and use the space-after.optimum attribute in every block that needs space after it. The second alteration is adding the XSLT information, but first the XML data layout must be defined.
The XML Datasource
The next big piece of the equation is the XML data. The data can come from existing XML files, web services, RSS feeds and more. Oftentimes, however, the data needs to come from a non XML source. Take a database with the following schema for example.
customers
---------------
id
name
address
city
state
postal
orders
---------------
id
customer (foreign key to customers.id)
dateWith these two tables it is possible to write one query that will provide all of the information needed for the example.
To get that data into XML consider the following PHP code.
<?php
    require_once "MDB2.php";

    $dbo = MDB2::factory("mysql://user:pass@localhost/db");

    $q = "
        SELECT c.id, c.name, c.address, c.city, c.state, c.postal, o.date
        FROM customer AS c
            INNER JOIN orders AS o ON o.customer = c.id
        WHERE o.date >= DATE_SUB(CURRENT_DATE(), INTERVAL 90 DAY)";

    $xml = "<?xml version=\"1.0\" encoding=\"UTF-8\"?><data>";

    $rs =& $dbo->query($q);

    while ($row = $rs->fetchRow(MDB2_FETCHMODE_ASSOC)) {
        $xml .= "<customer ";
        $xml .= "name=\"" . $row["name"]. "\" ";
        $xml .= "address=\"" . $row["address"]. "\" ";
        $xml .= "city=\"" . $row["city"]. "\" ";
        $xml .= "state=\"" . $row["state"]. "\" ";
        $xml .= "postal=\"" . $row["postal"]. "\" ";
        $xml .= "date=\"" . $row["date"]. "\" ";
        $xml .= "/>";
    }

    $xml .="</data>";
?>
The code connects to the database, MySQL in this case, and runs a query to get the database. Then it loops through the data creating an XML string. When the script is finished the XML looks like this.
<?xml version="1.0" encoding="UTF-8"?>
<data>
  <customer name="John Doe" address="123 Anywhere" city="Sometown" state="US" postal="12345" date="2008-03-26"/>
  <customer name="Jane Doe" address="321 Main" city="Anytown" state="US" postal="54321" date="2008-03-04"/>
</data>
It should be noted that many of the PHP XML extensions will create XML in a proper object oriented fashion. For simple applications, such as this, concatenating strings should be sufficient.
Another way to get XML from a database is to use the XML_Query2XML PEAR library. To install the library use PEAR.
$ sudo pear install XML_Query2XMLThe code using XML_Query2XML looks like this:
<?php
    require_once "XML/Query2XML.php";
    require_once "MDB2.php";

    $dbo = MDB2::factory("mysql://user:pass@localhost/db");
    $q2x = XML_Query2XML::factory($dbo);

    $q = "
        SELECT c.id, c.name, c.address, c.city, c.state, c.postal, o.date
        FROM customer AS c
            INNER JOIN orders AS o ON o.customer = c.id
        WHERE o.date >= DATE_SUB(CURRENT_DATE(), INTERVAL 90 DAY)";

    $dom = $q2x->getXML(
        $q,
        array(
            "rootTag" => "data",
            "idColumn" => "id",
            "rowTag" => "customer",
            "attributes" => array(
                "name",
                "address",
                "city",
                "state",
                "postal",
                "date")
        )
    );

    $xml = $dom->saveXML();
?>
This solution is more elegant than the string concatenation method, but they both produce the same result.
Adding XSLT to the FO
As mentioned previously, to use an FO document with FOP it has to be converted to an XSLT first. To make it an XSLT simply add the declaration lines to the top and the closing tags to the bottom. Then add the XSL template tag — data in this case. This tells the XSLT transformer where the transformation starts and ends. This is an abbreviated version of what the document should look like.
<?xml version="1.0" encoding="utf-8"?>
<xsl:stylesheet version="1.1"
    xmlns:xsl="http://www.w3.org/1999/XSL/Transform"
    xmlns:fo="http://www.w3.org/1999/XSL/Format"
    exclude-result-prefixes="fo">

    <xsl:output method="xml" version="1.0"
        omit-xml-declaration="no" indent="yes"/>

    <xsl:template match="data">
        <fo:root xmlns:fo="http://www.w3.org/1999/XSL/Format">
        ...
        </fo:root>
    </xsl:template>
</xsl:stylesheet>
Now that the FO is XSLT compatible it is time to add the XPath expressions to place the data from the XML into the correct positions.
In the example the final PDF needs to contain a new page in the PDF for every customer. To do that add an XSL for-each tag that wraps the FO page-sequence tag, as discussed above.
...
<xsl:for-each select="customer">
<fo:page-sequence master-reference="first">
...
</fo:page-sequence>
</xsl:for-each>
...
The final step to positioning the data is to add XSL value-off tags. These tags specify where the data goes in the final PDF. Every text block that has a placeholder, text in square brackets, needs to be replaced with one of these tags. The value-off tags can also handle a myriad of formatting functions. For information about these functions see the W3C XPath specifications (see resources). Here is the complete XSLT.
<?xml version="1.0" encoding="utf-8"?>
<xsl:stylesheet version="1.1"
xmlns:xsl="http://www.w3.org/1999/XSL/Transform"
xmlns:fo="http://www.w3.org/1999/XSL/Format"
exclude-result-prefixes="fo">
<xsl:output method="xml" version="1.0"
omit-xml-declaration="no" indent="yes"/>
<xsl:template match="data">
<fo:root xmlns:fo="http://www.w3.org/1999/XSL/Format">
<fo:layout-master-set>
<fo:simple-page-master margin-top="1in" margin-bottom="1in"
margin-left="1in" margin-right="1in"
page-width="210.000000mm" master-name="first">
<fo:region-body/>
</fo:simple-page-master>
</fo:layout-master-set>
<xsl:for-each select="customer">
<fo:page-sequence master-reference="first">
<fo:flow flow-name="xsl-region-body">
<fo:block text-align="right">
<fo:external-graphic src="url('logo.png')" />
</fo:block>
<fo:block><xsl:value-of select="@name"/></fo:block>
<fo:block><xsl:value-of select="@address"/></fo:block>
<fo:block space-after.optimum=".2in">
<xsl:value-of select="@city"/>
<xsl:value-of select="@state"/>
<xsl:value-of select="@postal"/>
</fo:block>
<fo:block space-after.optimum=".2in">
Dear <xsl:value-of select="@name"/>
</fo:block>
<fo:block space-after.optimum=".2in">
We would like to thank you for recent purchase
on <xsl:value-of select="@date"/>.
If there is anything that we can assist you
with please let us know.
</fo:block>
<fo:block space-after.optimum=".2in">Sincerely,</fo:block>
<fo:block space-after.optimum=".2in">Pointy Headed Boss</fo:block>
<fo:block>XYZ Widgets</fo:block>
<fo:block>123 Main</fo:block>
<fo:block>Anytown US 12345</fo:block>
<fo:block>800.555.5555</fo:block>
</fo:flow>
</fo:page-sequence>
</xsl:for-each>
</fo:root>
</xsl:template>
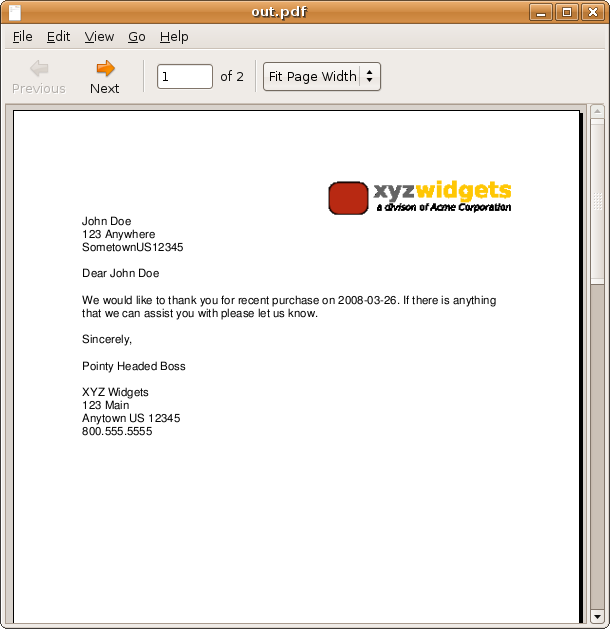
</xsl:stylesheet>At this point the FO-XSL is complete and is ready to be tested. Add echo $xml; to the end of one of the PHP scripts discussed earlier. Then run the following commands to create a PDF (Figure 2).
$ php query2xml.php > tmp.xml
$ fop -xml tmp.xml -xsl new-purchase.xsl -pdf out.pdf
The first command runs the PHP script to create some XML; the output is redirected to a file. The second command tells FOP where to find the XML data, the XSLT, and what the name of the output file should be. To view the PDF open it in Evince or one of the many Linux PDF readers.
Serving the PDF From a Web Page
Generating PDF documents with FOP is all well and good but integrating them into a self-service report/document generator is where the solution really shines. There are several ways to achieve this goal, as almost any programming language can be used to embed FOP. I am going to continue on using PHP, but the code can easily be ported to other environments.
There are two primary ways to generate a PDF using FOP from within PHP. The first, and easiest, is to use the exec function to call FOP from the command line. The second, and more elegant, is to use the PHP Java Bridge extension along with the XML_fo2pdf PEAR library.
To configuring the integrated solution install the PHP Java Bridge (see the resources for a link to the website). In most cases this involves compiling the code from scratch. If the target server is running a Red Hat based distribution the Java Bridge development team provides RPMs.
Before installing the extension there needs to be a working Java runtime on the target server or workstation. Again, the version needs to be greater than 1.4. It should also be mentioned that the Blackdown version of Java, the default Java version for many distributions, will work with this setup.
Next, open the php.ini file and enable the extension if the package manager did not already do so.
extension=java.soThe extension also has several variables that can be configured in the php.ini. However, changing these settings has a tendency to break the extension — at least in my environment. Be cautious when changing them.
Once the extension is setup, install the XML_fo2pdf PEAR library. PEAR is installed along side PHP in most distributions; if that is not the case install PEAR using the target systems package manager. Then, use PEAR to install the XML_fo2pdf library.
It is possible to use the integrated solution without the assistance of the XML_fo2pdf library; however, the library makes it easier.
At this point the PHP environment should be configured and ready to use.
As mentioned earlier there are two ways to call FOP from within PHP. The first is using the exec function. The exec function goes out to the system shell and runs whatever command it is passed. The exec function returns the last string echoed from the passed command.
<?php
    $fh = fopen("/tmp/tmp.xml", "w");
    fwrite($fh, $xml);
    fclose($fh);

    exec("fop -xml /tmp/tmp.xml -xsl new-purchase.xsl -pdf /tmp/tmp.pdf");

    header("Content-Type: application/pdf");
    readfile("/tmp/tmp.pdf");

    unlink("/tmp/tmp.xml");
    unlink("/tmp/tmp.pdf");
?>
As you can see there is not much to this code. The first thing it does is take a string of XML and write it to a temporary file. The XML has to be written to a file because FOP will not accept a string of XML from the command line. This string came from the code shown earlier on how to make the XML.
Next, the FOP call is made. Notice where the output file is written; whatever location is used here has to be writable by the web server — Apache in my case.
The final block of code sends the user’s browser a header command to announce the arrival of a PDF, streams the contents of the temporary PDF file to the browser, and finally removes the temporary files.
For the integrated solution the code looks a little different.
<?php
    require_once("XML/fo2pdf.php");

    java_require("/usr/share/fop/lib/fop.jar;/usr/share/avalon-framework-4.1/lib/avalon-framework.jar;/usr/share/batik-1.5/lib/batik-all.jar");

    $xml = new DOMDocument;
    $xml->loadXML($xml);

    $xsl = new DOMDocument;
    $xsl->load("new-purchase.xsl");

    $proc = new XSLTProcessor;
    $proc->importStyleSheet($xsl);

    $fo = $proc->transformToXML($xml);

    $pdf = new xml_fo2pdf();
    $pdf->runFromString($fo);
    $pdf->printPDF();
    $pdf->deletePDF();
?>
The first thing called in this script is the java_require function. This is part of the PHP Java Bridge and allows the developer to set the Java class path. There are several packages listed in this string. The first is the FOP library and it has to be on the path. The next two are the Avalon and Batik libraries; these are only needed if the XSLT loads graphics. All of these files need to be in a place that the web server can read them.
In this version an XSLT transformation is preformed on the XML and the stylesheet before it is passed off to FOP. This is done so that the file passed to FOP is pure FO. After the transformation the new FO content is passed off to the XML_fo2pdf library. The library calls FOP natively through the Java bridge to create a PDF. Finally the script sends the PDF to the browser and deletes the temporary PDF.
Of course, these scripts can also be modified to run on the command line if necessary. To make that change simply alter the print lines. In the case of the Java Bridge method change the $pdf->printPDF() to $pdf->returnPDF() and write what it returns to a file. For the exec solution change the PDF write path and remove the delete call.
I will also mention that none of the code in this article is production ready. It does not take race conditions or errors into account. I simplified everything for the sake of brevity.
Conclusion
The examples and explanations here are just a fraction of what this solution is capable of. With FO it is possible to create documents that include almost any feature that a typical word processor can produce. It can be used to generate payroll checks, invoices, statements, newsletters, software documentation, phone directories, and more.
Another unmentioned feature of this system is its portability. All of the examples here use PHP to create and serve the finished documents; in reality almost any server side web language could accomplish the same task. Furthermore, in a Java based environment, such as a JSP and Tomcat configuration, this kind of solution would thrive and be even easier to build.